Learn how to set up targeted email marketing flows triggered off Wunderkind's metrics in Klaviyo
ℹ️ We'll use each Wunderkind-provided metric to trigger its own targeted email flow for users that took the corresponding action. If you're trying to build a flow that falls outside of our default AMP-triggered flow strategy, please work with your Customer Success Manager to define requirements and build plan.
Create A Flow
In this example, we'll build a metric-triggered Cart Abandonment email flow step-by-step.
- In Klaviyo, go to Flows → Create flow → Build your own
- Name your flow "Wunderkind - Cart Abandonment" (See default flow names for each metric)
- Select or create the
wkndtag - Choose Create manually
- Select a trigger → All triggers → Metric
- Search for
wknd-cartabandonment - After selecting the metric, click Save→ Confirm and save
- Follow the steps in the Segment and Time Your Flow section to optimize message cadence, set UTM tracking, and target between prospective vs. returning customers.
- Once all AMP-triggered flows in your strategy are built out in Klaviyo, refine flow eligibility and cross-flow overlap by reviewing Wunderkind's default AMP-triggered flow profile filters and updating manually-created flows to match.
- Now that you've completed the steps above, attach content and creative to each email message. Be sure to select or build a creative that utilizes Wunderkind's dynamic product grid.
💡 Keep in mind that Klaviyo allows you to clone existing flows, during which you can select a new metric trigger for the clone.

Segment and Time Your Flow
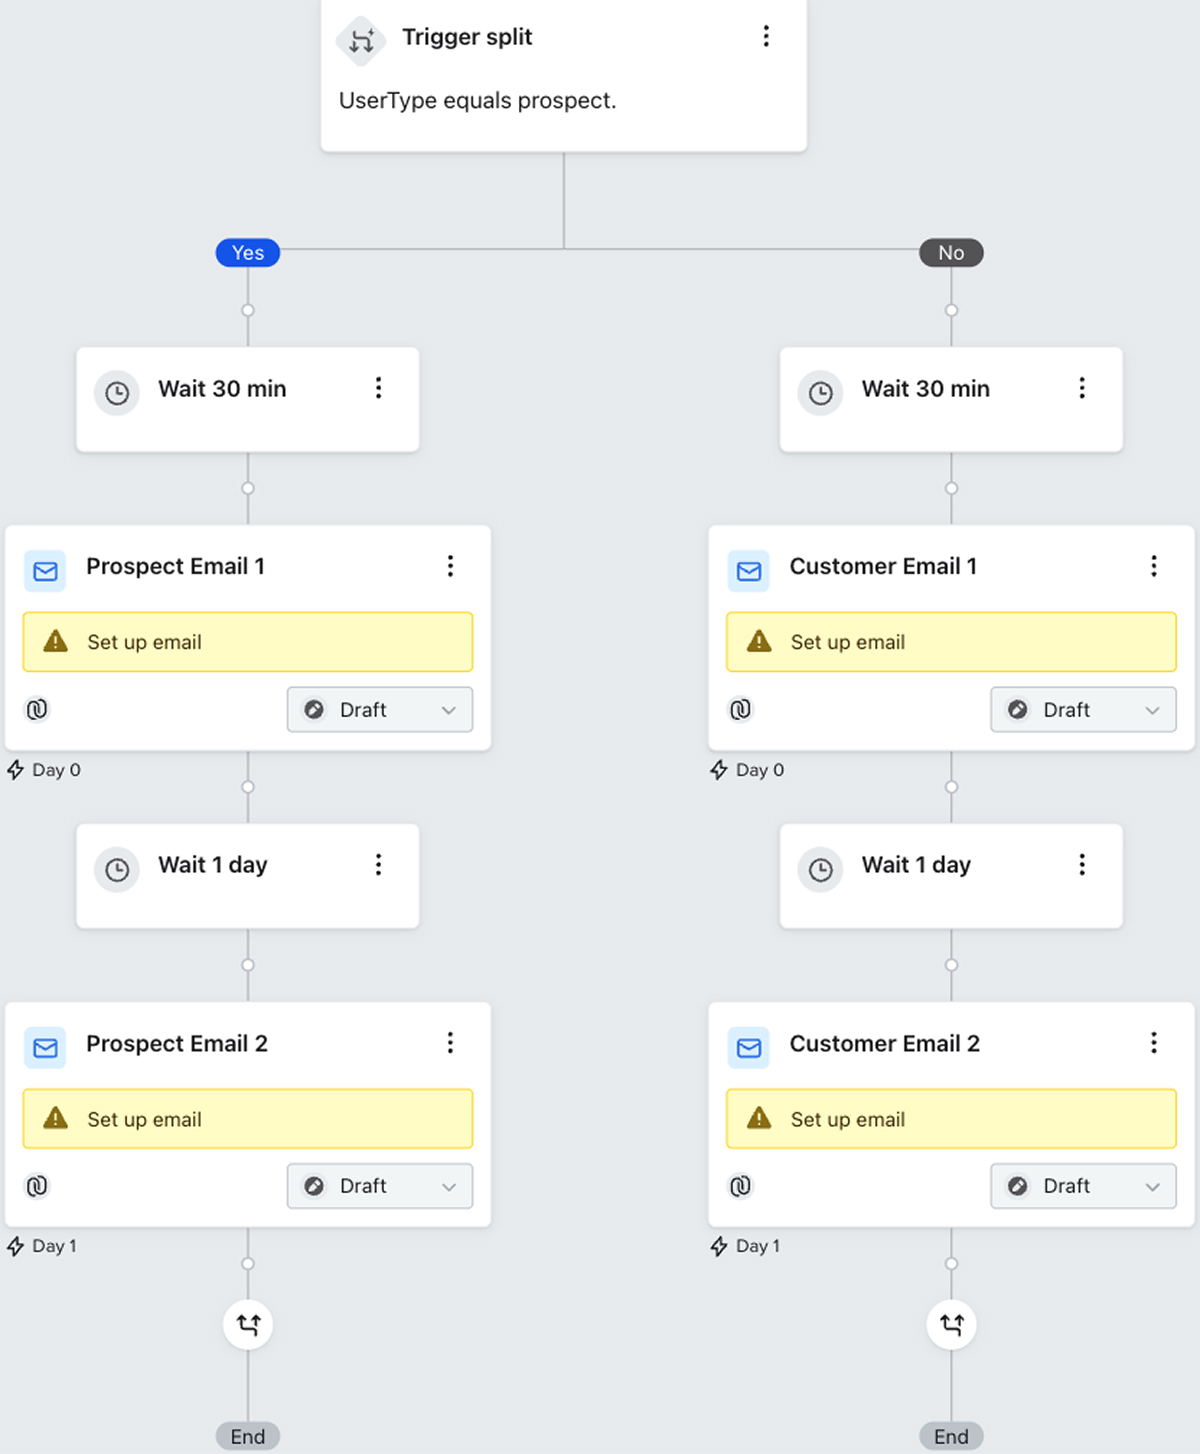
- From the left panel, drag a Trigger split into your flow
- In the right panel, set the Trigger split details to check if
UserTypeequalsprospect - After clicking Save, your flow will update to show a Yes/No split
- From the left panel, drag an Email into the
prospectpath - Under Email details → Subject and sender, fill out sender settings. Because you'll be cloning this email block as the starting point for all messages within the flow, skip adding touchpoint-specific content at this step.
- Under Email details → Settings
- Disable "Skip recently emailed profiles" (i.e. Smart Sending)
- Enable "Use custom tracking parameters". Ensure each message follows the parameter requirements outlined here
- Using the three dots menu, Clone the email to create additional messages within the prospect flow, separated by our recommended Time delays
- Repeat steps 4-7 for the
customerpath of the Trigger split - See below for visual references of Wunderkind's recommended segmentation and cadence for Abandonment vs. Catalog, respectively. Once you have finished replicating, continue with step 9 in the Create a Flow section.

Abandonment

Comments
0 comments
Please sign in to leave a comment.